Register and login to use the Lightboxes and Client Area.
There are registered members and guests currently viewing the site.

A password will be e-mailed to you.
- Hello Guest!
- Log In | Register
- Online Members: Guests:
There are registered members and guests currently viewing the site.
A password will be e-mailed to you.

|
||||||||||||||||
Neat Image Noise-Reduction Plugin for PhotoShop CS3 - How good is it?PhotoShop CS3 does many things very well, but its attempts at noise reduction in an image leave a lot to be desired. When shooting for quality, I will always leave the ISO set as low as possible, but in low-light situations a certain minimum shutter speed is needed to avoid blurry photos, and if I can't increase the aperture, the only alternative is to increase the ISO, which inevitably leads to a noisier photo - in other words, one with more graininess. As PhotoShop CS3 can only make a token attempt at removing the noise, other companies have sprung up to offer PlugIns: programs that integrate with the main image processing program to provide extra actions and utilities. The PlugIn that I am looking at here is the Neat Image The key features of the latest version:
Neat Image is currently produced in five editions: Demo, Home, Home+, Pro and Pro+. Demo is a free edition of the software with slightly-limited functionality. Home is the edition of Neat Image for home users who only have small amounts of images to process. Pro is the edition of Neat Image providing professional users with 16-bit image processing and unlimited queuing / batching capabilities. In addition to the standalone application in the Home and Pro editions, the Home+ and Pro+ editions include the Photoshop-compatible plug-in version of the filter.
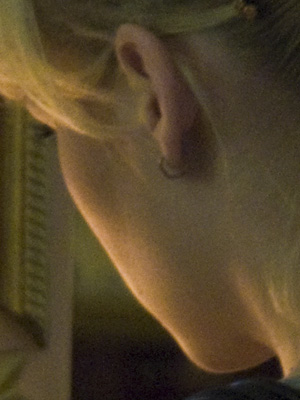
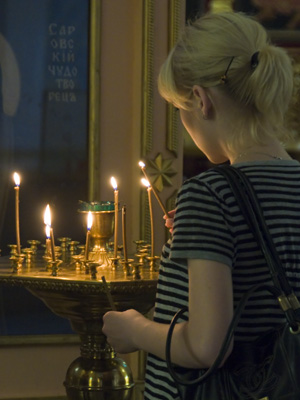
Neat Image is easy to use. Open the photograph with PhotoShop in the normal manner. Here we see the original of the photo, and an enlargement of the girl's face to one hundred percent, that shows the original noise on the image. To start the noise reduction, click Filter > Neat Image > Reduce Noise. 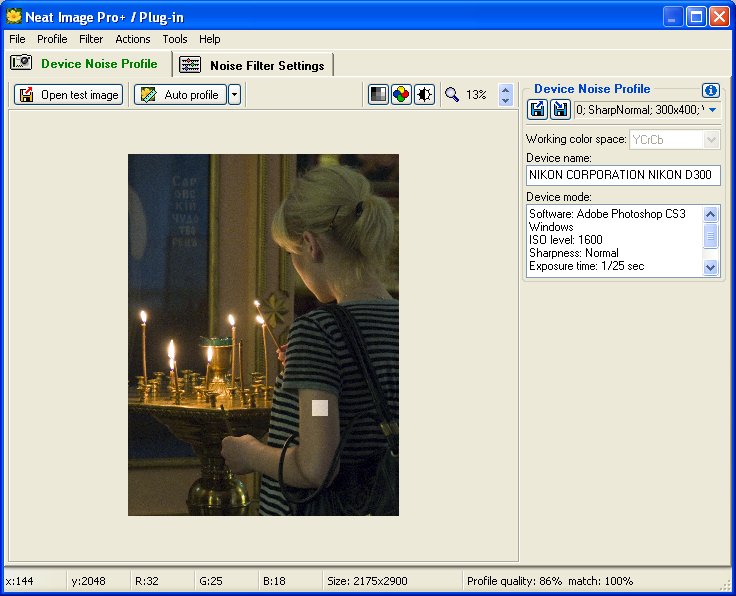
The initial screen of the Neat Image noise processor will appear, as above. Click the Auto Profile button, and the program will create a noise profile for the image using a small neutral section of its choice. If you think the area chosen is not suitable, you can click-and-drag a square yourself, then click the Auto Profile button again. 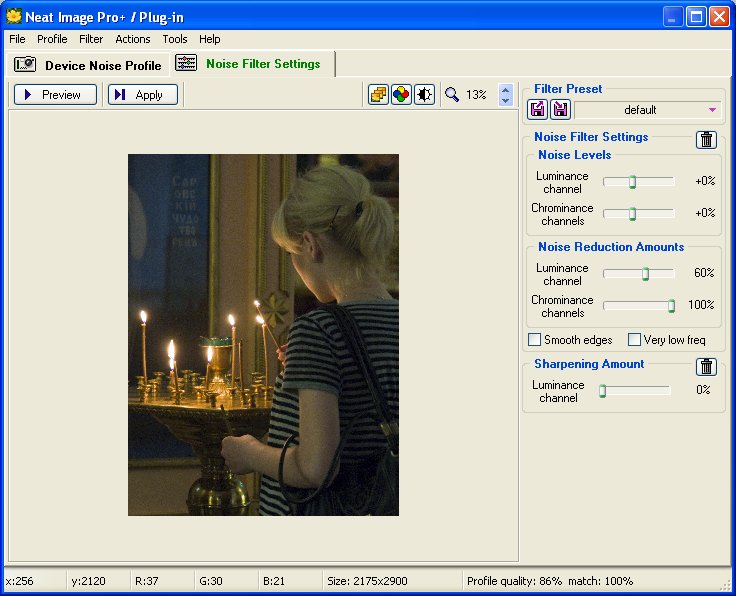
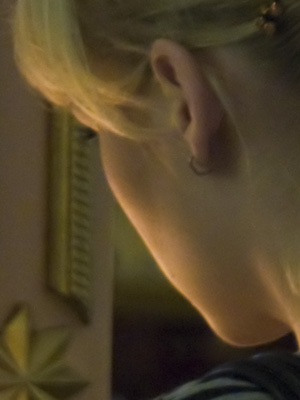
Once a profile has been created, click the Noise Filter Settings tab to move to the next part of the process. The second screen of the Neat Image noise processor will appear, as above. Click the Apply button, and the noise reduction will take place, and the Neat Image window will close. If you want to try again with different settings, use the History palette to jump to the last state of the image. Here we can see the result of the noise reduction process: on the left is the final image, and on the right is the same section as above, enlarged to one hundred percent as before. You can clearly see that the noise has been markedly reduced with no loss of quality or clarity. None of the images in this Tutorial have been Sharpened in PhotoShop. This Tutorial has just covered the simplest examples of the use that Neat Image can be put to. To learn how to use Neat Image in detail, I would suggest that you consult their tutorial at their website, which you can find on this page |
Stock Photograph SearchAdvanced Search PageTag CloudPopular searches on this site. Latest Photos | |||||||||||||||